It’s been about a month since I returned to Hong Kong from Chengdu, but due to being busy with other things, I didn’t feel motivated to start writing the travelogue. Now that I’ve finally had some free time, I quickly got to sorting through the photos and planning the travelogue. Initially, I intended to use a lot of text to introduce the features and history of Tibet’s attractions, but then I thought better of it. Firstly, my knowledge on these topics is limited, and secondly, such information is readily available online, so there’s no need for me to pretend to be an expert. Therefore, this travelogue will mainly feature scenic photos to document what we saw and experienced along the way, and also serve as a record of this unique graduation trip. Hopefully, I can revisit these unforgettable memories in the future.
Medicine King Mountain (Sunrise)
Travel Planning
At first, I had planned to travel alone in Taiwan for a month, but a friend suggested a trip to Tibet. After some consideration, I couldn’t resist the temptation and changed the plan to go to Tibet with friends. Initially, we only planned to spend just over a week in Tibet, but when we actually started planning the itinerary, we realized that a little over a week was far too short. Tibet is simply too vast, and the distances between attractions are great. To fully enjoy the trip, we eventually planned a 19-day itinerary. The details are as follows (for reference only):
Departure Date: 2017.06.02 (Day 1)
Return Date: 2017.06.20 (Day 19)
2017.06.02–2017.06.04 (Day 1–3): Hongxian Xian Shenzhen Luohu – Guangzhou Station – Xining Station – Lhasa
2017.06.05–2017.06.06 (Day 4–5): Sightseeing in Lhasa
Recommended for the day: Barkhor Street, Sera Monastery, Jokhang Temple, Medicine King Mountain Viewpoint (sunrise), Old Fish Dinner (sunset)
2017.06.07 (Day 6): Lhasa – Gangbala Snow Mountain – Yamdrok Lake – Karola Glacier – Shigatse
2017.06.08 (Day 7): Shigatse – Rongbuk Monastery – Everest Base Camp
2017.06.09 (Day 8): Everest Base Camp – Lazi – Tashilhunpo Monastery – Shigatse
2017.06.10 (Day 9): Shigatse – Northern Tibetan Grasslands – Namtso Lake
2017.06.11 (Day 10): Namtso Lake – Nagela Pass – Lhasa
2017.06.12 (Day 11): Lhasa – Gongbo’gyamda – Kading Gully Scenic Area – Nyingchi
Recommended for the day: Mila Pass, Kading Gully Scenic Area
2017.06.13 (Day 12): Nyingchi – Nyingchi Luolong – Tongmai – Bomi
Recommended for the day: Tongmai Bridge, Nyingchi Luolong Town, Sejila Mountain Forest Sea
2017.06.14 (Day 13): Bomi – Midui Glacier – Ranwu Lake – Basu
Recommended for the day: Bomi Ancient Township, Ranwu Lake, Midui Glacier
2017.06.15 (Day 14): Basu – Bangda – Zogang – Markham
Recommended for the day: Lancang River Grand Canyon, Jueba Mountain, Dongda Mountain, Bangda Grassland, Heaven Road Twelve Turns, Nujiang River Canyon
2017.06.16 (Day 15): Markham – Batang – Litang – Daocheng – Shangri-La Town
Recommended for the day: Maoya Grassland, Haizi Mountain, Sister Lakes, Jinsha River Bridge
2017.06.17 (Day 16): Shangri-La Town – Yading Scenic Area – Luorong Pasture – Five-Color Lake – Milk Lake – Shangri-La Town
Recommended for the day: Five-Color Lake, Milk Lake, Mount Yangmaiyong
2017.06.18 (Day 17): Yading – Riwa – Daocheng – Litang – Xinduqiao
Today's Recommendation: Various Mountain Passes
2017.06.19 (Day 18): Xinduqiao – Chengdu
Today's Recommendation: Kuanzhai Alley
2017.06.20 (Day 19): Chengdu – Hong Kong
Today's Recommendation: Jinli
Cost-wise
The entire trip cost around 13K HKD, which could be considered semi-budget travel.
Breakdown of expenses: Train HKD1000, Return flight HKD700, Insurance HKD200, and I brought 10500 RMB to Tibet, with about 1000 RMB remaining, which converts to roughly HKD10900, bringing the total to about 13K HKD. The biggest expense was undoubtedly the car rental with a driver. Renting a car for 13 days cost 5000 RMB (Everest 5-day tour 1200 RMB + Sichuan-Tibet line 8-day 3800 RMB). Other food and accommodation costs were flexible, but restaurants along the road after leaving Lhasa weren't cheap, averaging around 40-50 RMB per meal. Accommodation was more troublesome because Hong Kong people have to stay at hotels qualified to host foreign guests, which tends to be expensive. However, my friend and I were very lucky to meet a driver with a wide network, allowing us to stay in some cost-effective guesthouses. Otherwise, the accommodation expenses would have been much higher.
Transportation
There are basically four ways to get to Lhasa. You can fly from Hong Kong to Chongqing or Chengdu and then take a domestic flight to Lhasa. The second option is to fly to Xining first and then transfer to a train to Lhasa. The last option is to take a direct train from Guangzhou Station to Lhasa. On this Tibet trip, my friend and I chose to take a direct train from Guangzhou to Lhasa because we initially thought it was the most convenient, but if I had to choose again, I definitely wouldn’t take the direct train from Guangzhou to Lhasa. First, the journey is just too long, totaling 58 hours, and the scenery from Guangzhou to Xining isn’t as beautiful as imagined. If you want to see the scenery, you can just take the train directly from Xining onto the Qinghai-Tibet Railway. So if I had to choose again, I would fly to Xining first and then take the train to Lhasa. That way it only takes two days, and you can also enjoy the beautiful scenery outside the train.
In Tibet, the main mode of transportation is hiring a private car, i.e., finding a driver. Many people online say it’s better to hire a Tibetan driver, but I don’t think that’s necessarily the case. In fact, many drivers in Tibet are actually from other regions, but they’re also very familiar with the roads and rules there, so there’s no need to worry about being scammed. If you don’t have enough people for a private car, you can post on backpacker hostels to find someone to share the ride. However, driving yourself is not recommended. First, the roads in Tibet are very tough, and each day’s journey takes about 7-8 hours — you’ll likely be too exhausted to enjoy the trip. Secondly, most highways in Tibet have speed limits or time restrictions, and not knowing the rules could result in heavy fines. There are also many checkpoints along the way, so it’s best to have a driver who knows the area well.
Altitude Sickness
Before planning the trip to Tibet, I’m sure many people, myself included, worried about experiencing altitude sickness upon arrival in Lhasa. Many online sources suggest taking Rhodiola rosea in advance to help with acclimatization, but in truth, it doesn’t really help. Here, I recommend a Western medicine called Acetazolamide, which can be bought at pharmacies or clinics. But if you want to buy it directly from a pharmacy, you’ll need to show a doctor’s note. My friend and I both took this Western medicine. We only had mild headaches on the first day in Lhasa, and by the next morning after waking up, we felt completely fine. However, my friend and I did experience two side effects from this medication: localized numbness and diuresis. At its peak, I had to go to the bathroom ten times a day, but it really did work well.
About Applying for a Border Permit
Entering Everest Base Camp requires obtaining a border permit in advance. Foreign tourists need to have it arranged by a tour guide. But for Hong Kong people, it can be handled by the driver, as long as you bring your Hong Kong ID and Home Return Permit. The process takes about a morning (3–4 hours), so when planning your itinerary, make sure to set aside a morning to go with the driver to apply for the permit.
Recommendations
- Since Tibet is a very dry place with long daylight hours, it’s essential to stay well-hydrated and carry sun protection gear. It’s recommended that travelers consider bringing sunscreen, a hat, a face mask, a thermos (to keep hot water), lip balm, and herbal cooling tea sachets.
- The temperature in Tibet varies greatly, so to avoid getting sick, it’s advised to bring enough warm clothing (such as down jackets and gloves).
- You may carry an appropriate amount of cold medicine. If you feel unwell during the trip, you can take it immediately to prevent the condition from worsening. Of course, if possible, it’s highly recommended to visit a local hospital, as getting sick at high altitudes can easily lead to pulmonary edema, which can even be fatal.
- If you’re a student, remember to bring your student ID, as showing it when purchasing tickets for attractions in Tibet will get you a 50% discount. Since most attractions in Tibet require tickets, having a half-price discount can save you quite a bit of money.
Day 1– Day 3: Train Journey
Itinerary: MTR Lo Wu Station – Shenzhen Station – Guangzhou Station – Xining Station – Lhasa Station
During the first two days of the train journey, there wasn’t anything particularly scenic to see. The real highlight started with the sunrise on the morning of the third day until arriving in Lhasa. In just half a day on the train, you can see snow-capped mountains and vast grasslands, as if experiencing winter and summer in one go.
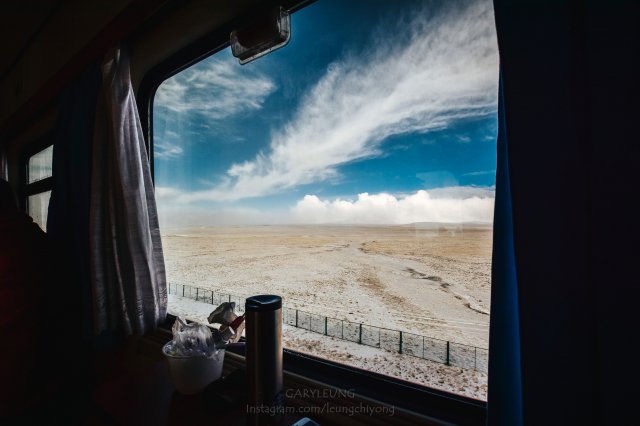

Day 4– Lhasa Sightseeing
Itinerary: Sunrise at Yaowang Mountain – Potala Palace Exterior – Jokhang Temple – Sunset at Old Fish Restaurant
On the morning of the second day in Lhasa, my friend and I dragged ourselves out around 6 AM to take a car to Yaowang Mountain to secure a spot for the sunrise. But upon arrival, we found out that Yaowang Mountain doesn’t open until around 7 AM. Fortunately, the staff opened it early for us, so we didn’t have to wait in vain. We ended up being among the first to arrive. About five minutes later, another group of photographers squeezed me into a corner. But maybe because it was a Monday, there weren’t as many people taking sunrise photos as expected. After sunrise, there were only about a dozen people on the viewing platform. However, according to the photography team nearby, the day before, the entire viewing platform was packed, and someone even kicked their tripod, so they had to come back today to retake their shots.
Yaowang Mountain (Sunrise)
Outer area of the Potala Palace
After sunrise, I followed the crowd to the opposite side and wandered around the outer area of the Potala Palace. Along the way, I often saw devout believers performing full-body prostrations, almost every three steps. From the entrance all the way to the end, there are prayer wheels, which are said to count as reciting a scripture each time you turn one. If you want to take a photo of the Potala Palace’s reflection, you can also visit the nearby Black Dragon Pool, which is one of the spots for capturing the palace’s reflection.

Outer area of the Potala Palace- Black Dragon Pool
Outer area of the Potala Palace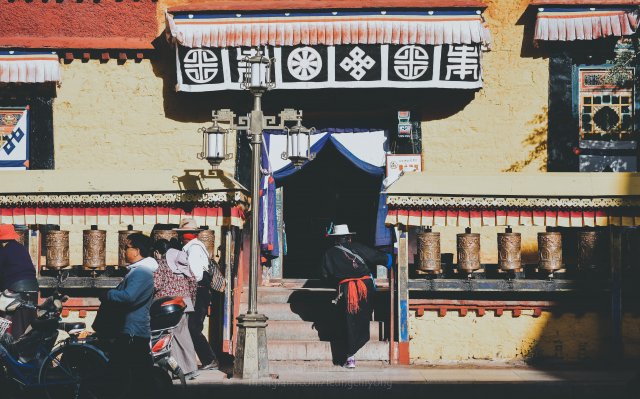
Outer area of the Jokhang Temple
After walking around the outer area of the Potala Palace, I couldn’t fight off my sleepiness and went straight back to the hostel for a nap until around 3 pm. Then I headed out to explore Barkhor Street and the Jokhang Temple. Originally, I had planned to shoot the sunset from a specific spot inside the Jokhang Temple, but when I arrived, I found that the spot was closed for renovations and inaccessible. So in the end, I just wandered around looking for other things to photograph.
Inside the Jokhang Temple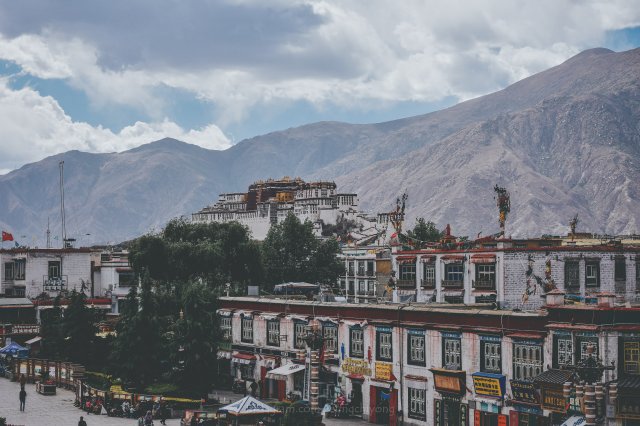

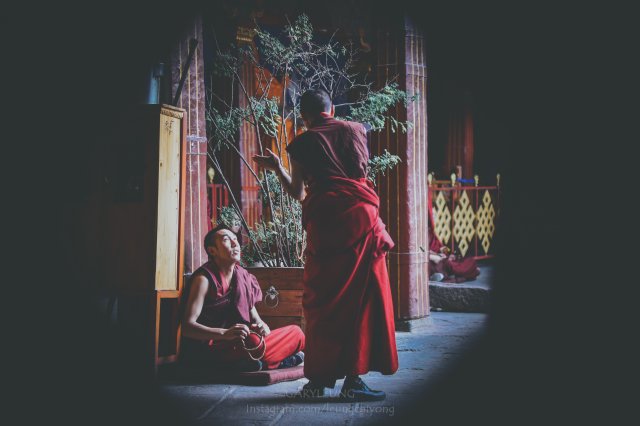
Jokhang Temple Debate
If you visit the Jokhang Temple, I recommend paying attention to the debating sessions of the lamas. If your timing is right, you can enjoy their fascinating debates. Although the debates are conducted in Tibetan, it doesn’t stop us from appreciating the excitement. During the debates, you’ll see standing monks occasionally clapping their hands in front of the seated ones—apparently, this is believed to drive away ignorance. The seated monks often appear calm and composed, as if carefully listening to the arguments.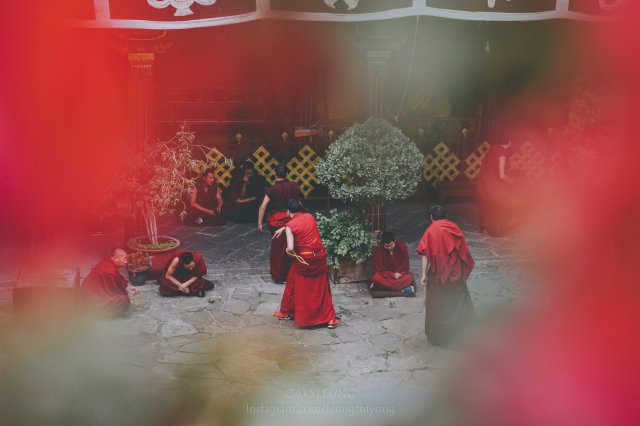
Old Fish Dinner (Sunset)
Since the sunset photography spot inside the Jokhang Temple was closed, after enjoying the great debates, I had to head back to Old Fish Dinner earlier to have dinner while waiting for the sunset. The viewpoint at Old Fish Dinner is located on the upper floor of the restaurant. If you can’t find the spot, just ask the staff—they’re always happy to show you the way.
Potala Palace Square
At night, my friend and I came to Potala Palace Square to shoot the night view. But to capture the reflection of the Potala Palace, we had to wait until the musical fountain finished before we could walk into the fountain area to take photos. Unfortunately, we only got about 10 minutes before the People’s Liberation Army announced over the loudspeaker that people had to leave the square. So if you want to capture this reflection, be sure to manage your time well.
Day 5- Lhasa Sightseeing
Itinerary: Sera Monastery
There aren’t as many attractions to visit within Lhasa City as you might expect, and some places you’d like to go are too difficult to reach. So on the second day in Lhasa, my friend and I only planned to visit Sera Monastery. When we arrived at Sera Monastery, since my friend didn’t want to buy a ticket to get in, we split up. Later I found out they actually climbed up a small path beside the monastery to the top of the hill to overlook Lhasa City—and that spot is actually the sunset viewpoint I had always wanted to go to. But because I entered the monastery, there was no path up the hill from inside, so if you want to go to that hilltop viewpoint, don’t go into the monastery. Also, compared to the Jokhang Temple in central Lhasa, Sera Monastery in the suburbs is filled with a sense of history both inside and out. Moreover, taking photos with cameras during the debates at Sera Monastery is not allowed, but visitors are permitted to take photos or record videos with their phones.
Viewing the Potala Palace from Sera Monastery
Inside Sera Monastery
Sera Monastery Debate

Day 6- Departing for Shigatse
Itinerary: Lhasa – Gangbala Mountain – Yamdrok Lake – Karola Glacier – Shigatse
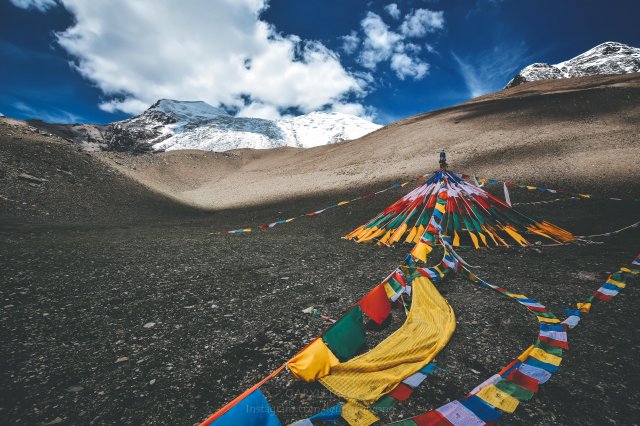
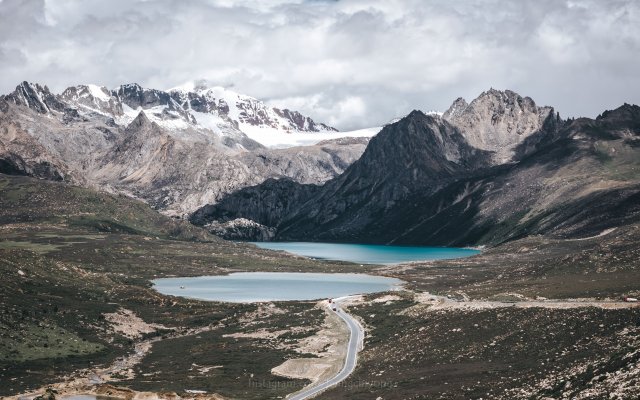
On the way to Shigatse, we passed by Gangbala Mountain, Yamdrok Lake, and the Karola Glacier. But compared to the more famous Yamdrok Lake, I preferred the scenery of the Karola Glacier—perhaps because it’s closer to the snow-capped mountains. Unfortunately, it was summer, so the snow only covered the higher altitudes. Additionally, what you’ll see the most here are the colorful prayer flags. They can be found almost everywhere in Tibet and are said to be one of the ways Tibetans pray for blessings. Sometimes you’ll even see Tibetans continuously throwing prayer flags into the wind on the mountains—it’s a spectacular sight. But I must say, the colorful prayer flags really complement the Tibetan landscape. The combination creates a very unique atmosphere.
Gangbala Mountain
Yamdrok Lake
Taken at Yamdrok Lake- Colorful Prayer Flags
Taken at the Karola Glacier- Five-color prayer flags
Taken on the outskirts of the Karola Glacier
Day Seven- Departure for Everest Base Camp
Itinerary: Shigatse – Rongbuk Monastery – Everest Base Camp
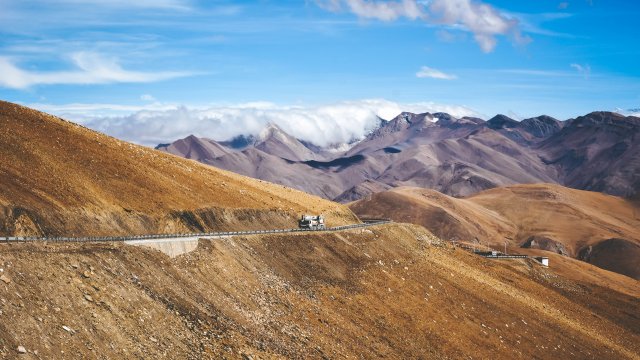
Not long after departing from Shigatse, you start to see herds of yaks and sheep along the road, as well as rather dilapidated Tibetan houses. Some might say these are the characteristics of Tibet, but I’d rather they could escape poverty sooner and live in clean, new homes. Also, the road to Everest Base Camp is often subject to speed limits and time restrictions, mostly 20–30 km/h. But luckily the weather was great, and the scenery along the way was absolutely stunning — otherwise it would’ve been really hard to endure the long hours in the car.
Taken on the way to Everest Base Camp
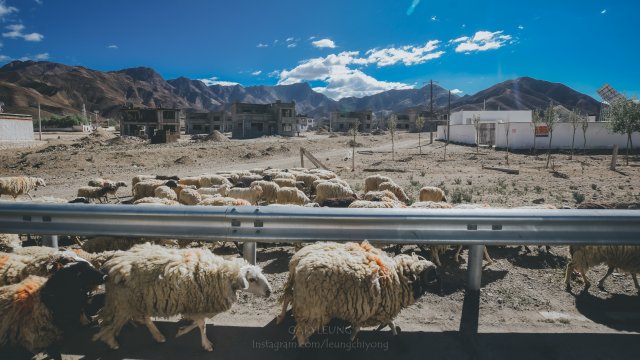

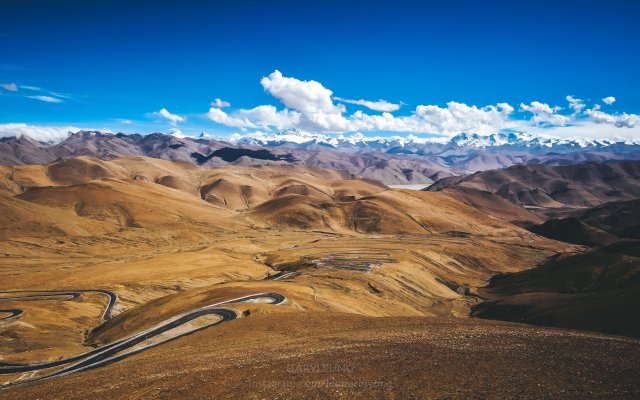
Taken in the toilet at the Everest Base Camp checkpoint
Worth mentioning is that after leaving Lhasa, the conditions of the toilets along the road were all pretty awful — some were so foul-smelling you could smell them even through your face mask, so in the end I’d rather answer nature’s call in the wild than use those so-called toilets. Also, most of the toilets along the way charge around 1–2 RMB per use. But sometimes looking out the window of certain toilets, you might find some unexpected surprises.
Everest photo spot
Once you arrive at Everest Base Camp and if there’s still daylight, you can buy a ticket to take a shuttle bus to a closer viewpoint for photos. However, personally I think the best photo spot is by a small stream not far from the base camp.
Stream near Everest Base Camp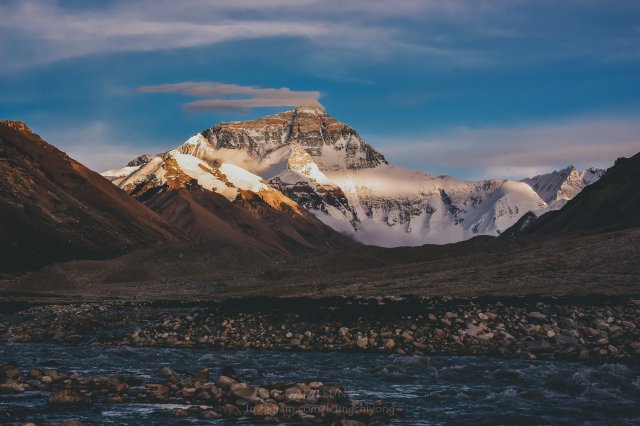
Sunrise golden mountain
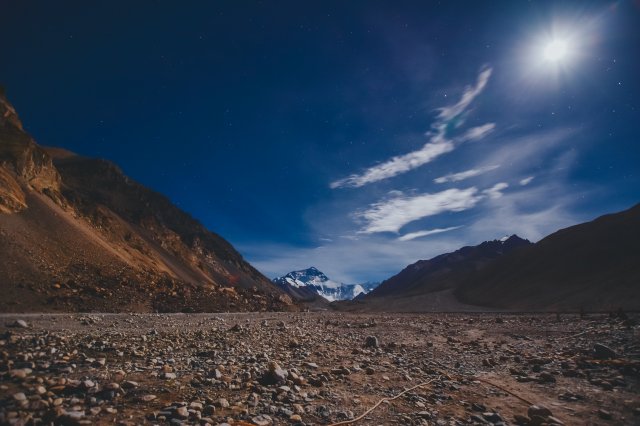
Although this trip to Everest didn’t allow me to capture the Milky Way due to the full moon, I was very lucky to have good weather and was able to photograph the sunrise golden mountain — achieving one of my life goals. Actually, before taking the shot, I mistakenly thought the golden glow on Everest happened at sunrise, but when I got there I realized my assumption was wrong. On Everest, the golden glow appears at sunset. As the sun slowly sets, the light shining on Everest gradually fades, creating this beautiful scene. But after capturing the golden glow, I suddenly realized something terrifying — this stupid mistake might be one of the biggest regrets of this entire Sichuan-Tibet trip. (The camera image format had somehow automatically switched back to BASIC JPEG)
Everest under the full moon
Day Eight- Return to Shigatse
Itinerary: Everest Base Camp – Tashilhunpo Monastery – Shigatse
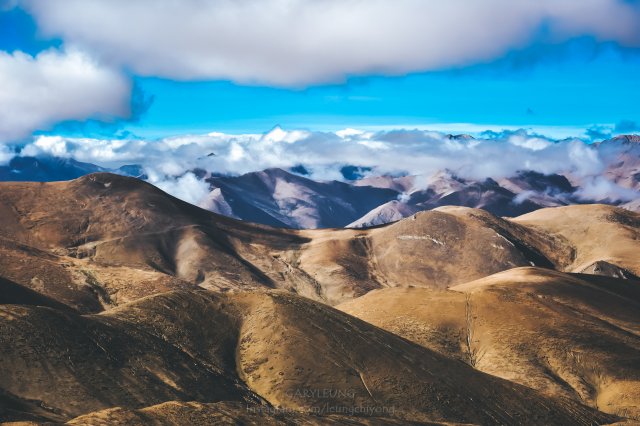
From the moment we left Everest and started the return journey, there were constant surprises, but opportunities often only lasted a moment. Since we were mostly on the highway with few places to stop and take photos, I had to fight sleep during the long drive just to capture the shots I wanted.
Taken on the return journey

Outside Tashilhunpo Monastery
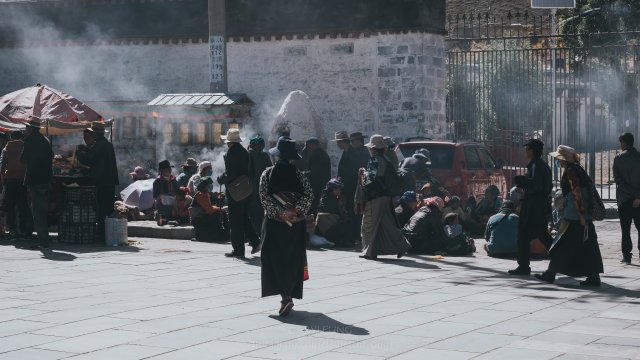
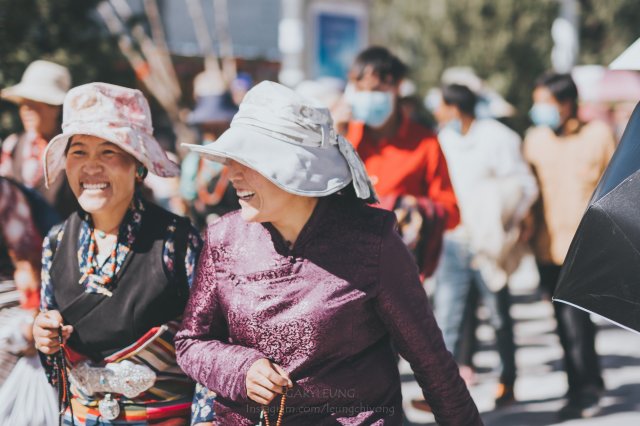
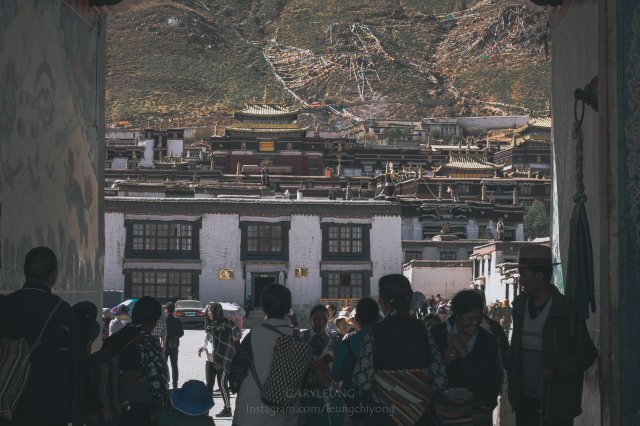
When we arrived at Tashilhunpo Monastery, it seemed we had just missed their festival — many roads were closed to vehicles, and the shaded areas on both sides were filled with Tibetans chatting and drinking sweet tea. But when you approach them, Tibetan kids nearby would block your way and ask for money. After being pestered a few times, I ended up walking in the scorching sun down the middle of the street. Since the others in our group weren’t interested in the monastery, we decided to just walk around the outer area of Tashilhunpo Monastery with the crowd. But probably because it was a festival, the streets were extremely crowded — basically shoulder to shoulder — so in the end we gave up on exploring and decided to head back to the hotel early to rest.


Day Nine- Heading to Namtso Lake
Itinerary: Shigatse – Northern Tibet Grassland – Namtso Lake
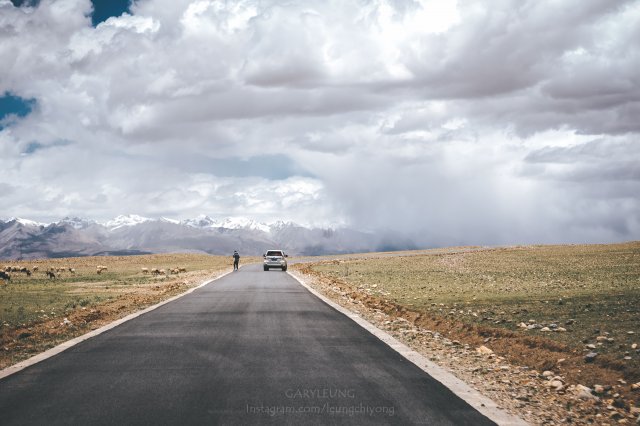
After resting in Shigatse for the night, we embarked on the journey to Namtso Lake. This part of the trip was arguably the most rewarding section of the whole journey — even the most random rest stops offered incredibly beautiful views. The Northern Tibet Grassland was dotted with herds of cattle and horses, making it another great photo spot.
Taken on the way to Namtso Lake
Taken in the Northern Tibet Grassland
Taken on the way to Namtso Lake
The weather in high-altitude areas is extremely unpredictable—just moments ago it might be clear blue skies, but in the blink of an eye dark clouds roll in, and the rain clouds here are especially massive. However, overcast skies paired with the plateau’s scenery can also be incredibly beautiful.

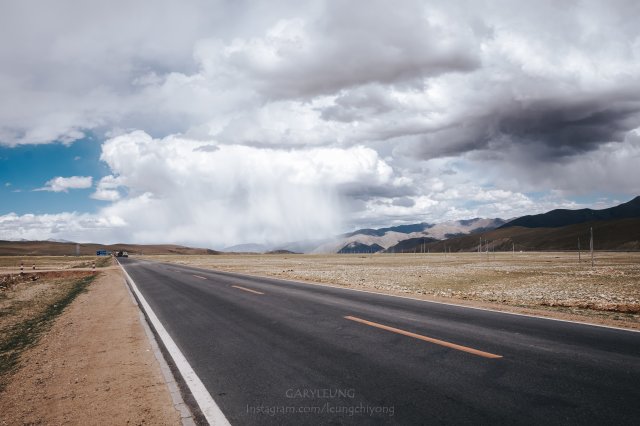
Viewing a faint rainbow from the vehicle
Taken on the way to Namtso Lake
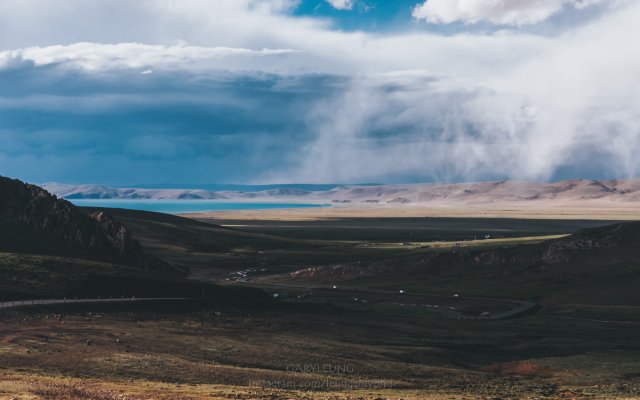

Taken at Namtso Lake
After arriving at Namtso, we had to give up on the idea of photographing the Milky Way due to overcast skies and a full moon. Fortunately, the weather cleared up the next morning, so after taking a few mandatory photos for the trip, we hurriedly got back on the vehicle and left.
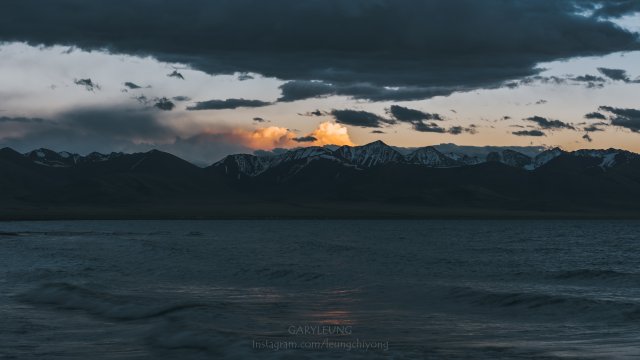
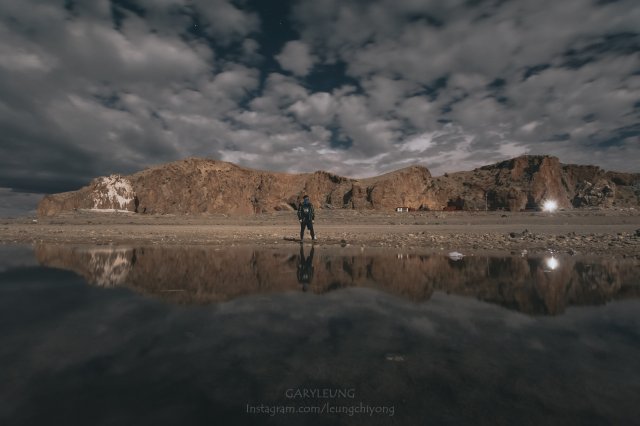

Day 10- Return trip to Lhasa
Route: Namtso Lake – Nagela Pass – Lhasa
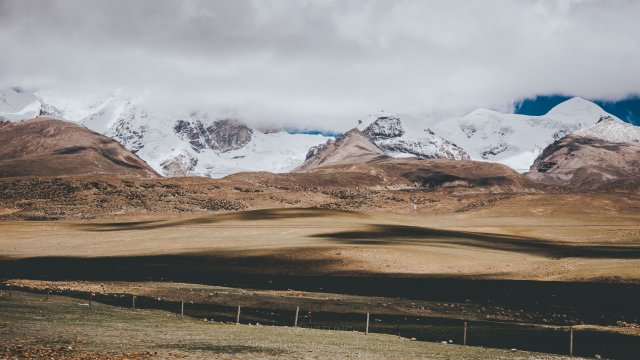
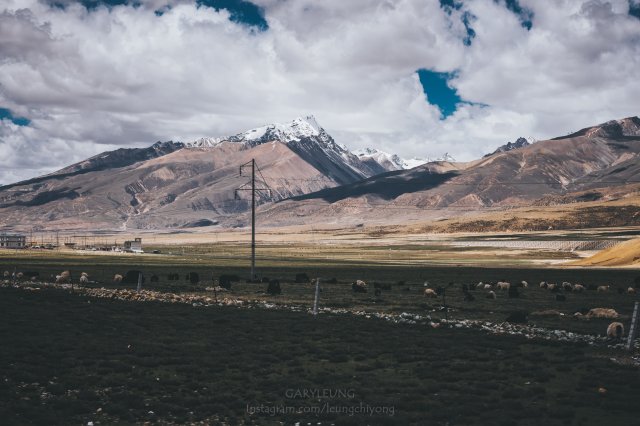
The five-day Everest tour has come to an end. Although we couldn’t photograph the Milky Way because of the full moon, we were lucky enough to have great weather for all five days—basically blue skies and white clouds every day—so we had a lot of fun. But the following eight days on the Sichuan-Tibet Highway weren’t as fortunate; it rained on nearly five out of those eight days. While rainy weather can also capture unique scenes, I’m sure the views would’ve been even more stunning on sunny days, and photography wouldn’t have been as much of a struggle.
Tibetan child
On the return journey
Day 11- Heading to Nyingchi
Route: Lhasa – Gongbo’gyamda – Kading Gully – Nyingchi
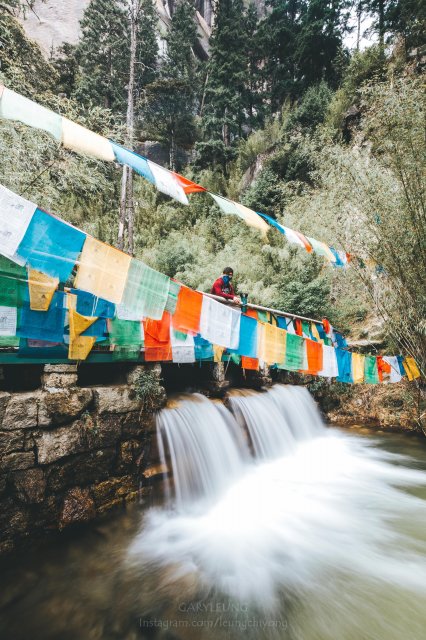
Just after leaving Lhasa, we could still enjoy the fiery sunrise from the vehicle, but not long after departing the weather took a sudden turn for the worse, with non-stop rain. As a result, when we finally reached the Mila Pass, we couldn’t get out to take photos—the surroundings were covered in thick fog. So we just quickly checked in before heading to Kading Gully. Originally, the itinerary planned to visit Basongcuo Lake first and then return to Nyingchi, but due to the poor weather, we scrapped that plan and instead headed to the closer Kading Gully scenic area. Perhaps because the ticket price for Kading Gully is relatively low, there were many tour groups inside, making it difficult to find a good spot for photos without dodging crowds. Still, considering the weather, we were just grateful to have something to shoot.
Taken at Kading Gully
Day 12- Heading to Bomi
Route: Nyingchi – Nyingchi Nongba Town – Tongmai Bridge – Bomi
Day two of the Sichuan-Tibet Highway. It rained all day long—I really have to admire my own luck. But maybe because of the rain, the clouds were especially low. Fortunately, visibility wasn’t hindered by fog this time, so we managed to capture some unique rainy landscapes.
Sejila Mountain Sea of Trees

Nyingchi Nongba Town
Palonggou Bridge
Tongmai Bridge
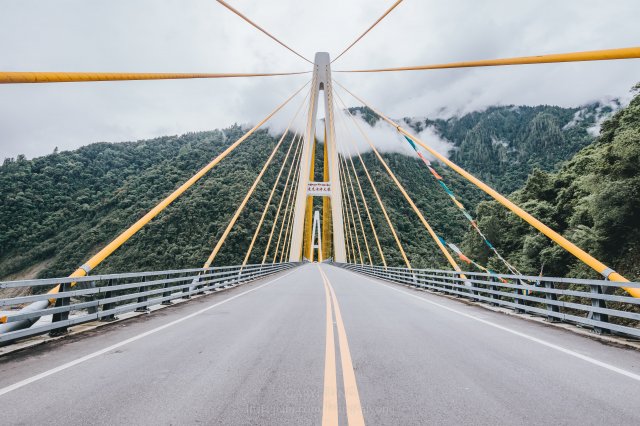
Since the new road was built, the old road has been closed to traffic, and as a result, the Tongmai Bridge has been abandoned. But the new road goes through many tunnels, causing you to miss out on a lot of scenic views. In contrast, the old road had no tunnels—you could’ve seen far more beautiful landscapes. It’s a shame that, likely due to safety concerns, the authorities decided to close the old road.
On the Sichuan-Tibet Highway
Bomi County
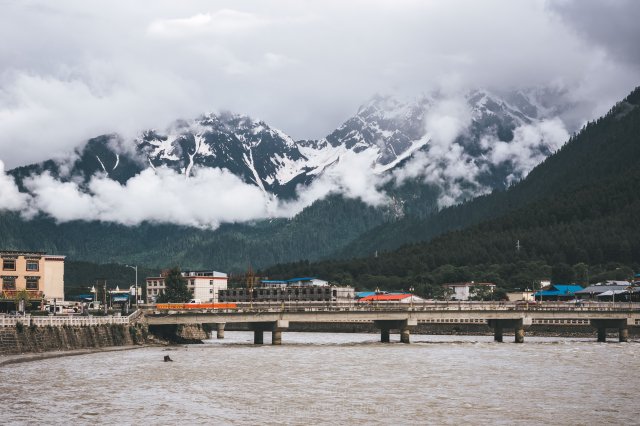
Day 13- Heading to Basu
Route: Bomi – Midui Glacier – Ranwu Lake – Basu
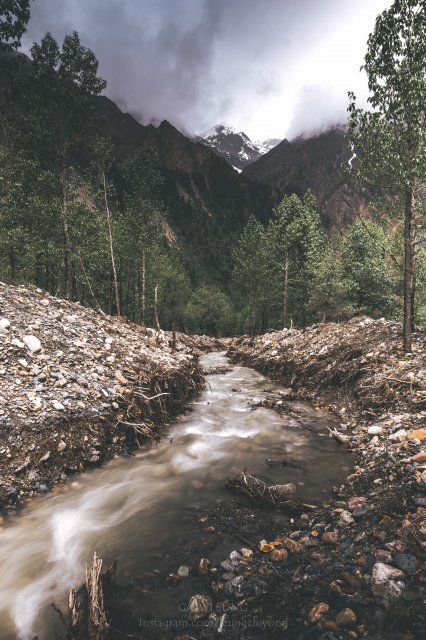
On the third day of the Sichuan-Tibet Highway, it was still raining heavily when we first set off in the morning. Three consecutive days of heavy rain had turned what were originally streams into torrential floods, almost like a mountain deluge.
On the Sichuan-Tibet Highway
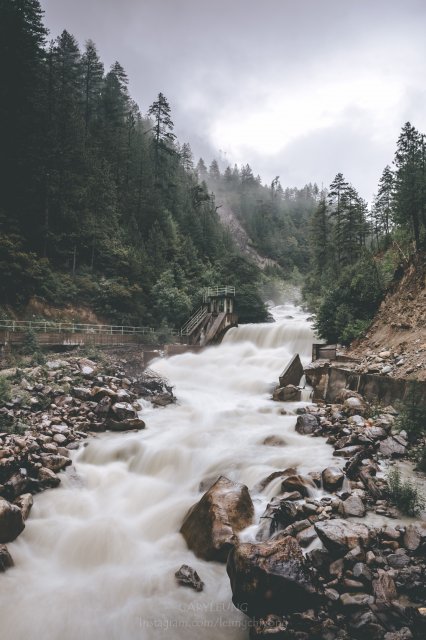

Midui Glacier
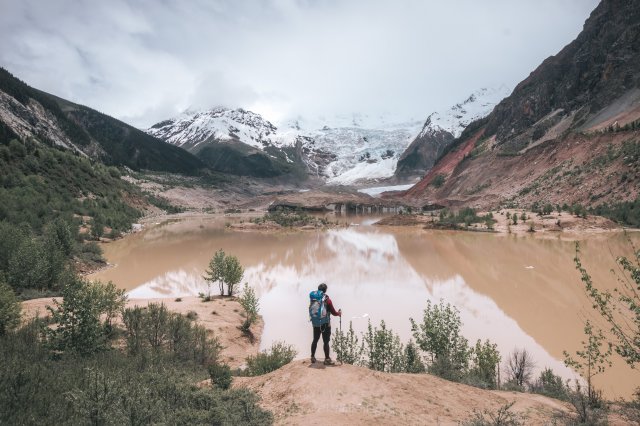
Midui Glacier—I believe it’s one of the most worthwhile places to visit along the Sichuan-Tibet Highway. Of course, the weather played a part, as after arriving at the glacier, the sky began to clear up and there was only intermittent light drizzle, so we had a great time taking photos. Additionally, the scenery at Midui Glacier is quite stunning. After passing through the fence at the viewing platform, we could get close to the water to capture reflections of the glacier. For those wanting to get even closer, you can take the small path to the left of the viewing platform, but you’ll need to set aside enough time.

Ranwu Lake
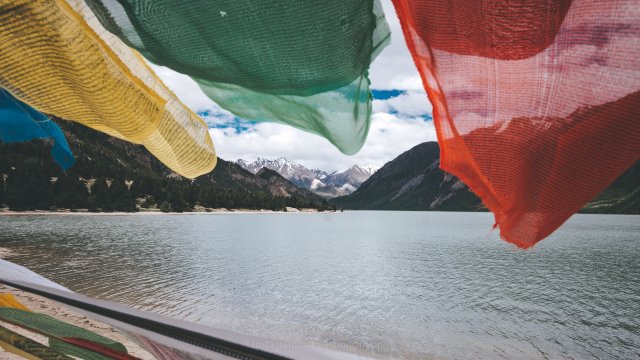
Shortly after leaving Midui Glacier, we arrived at our next destination: Ranwu Lake. To be honest, I was a bit disappointed—maybe because the higher your expectations, the greater the disappointment. Ranwu Lake wasn’t as beautiful as imagined, but fortunately, the sky was clear with some blue and white clouds, so we ended up taking a lot of graduation photos.


Day 14– Heading to Mangkang
Route: Basu – Bangda – Zogang – Mangkang
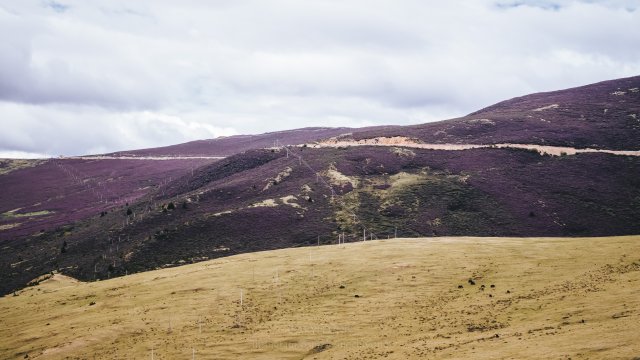
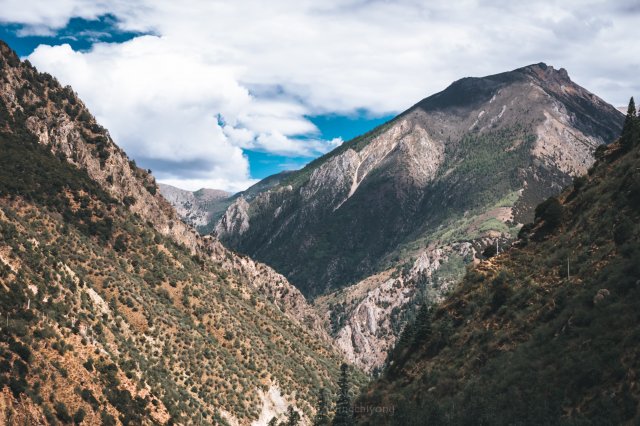
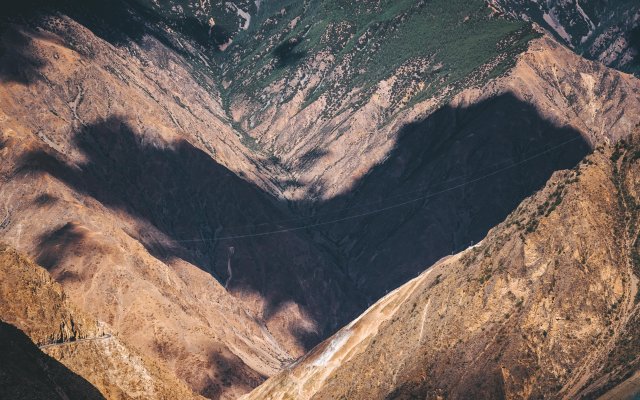
On the fourth day of the Sichuan-Tibet Highway, the weather finally cleared up after three consecutive days of rain. As we set off in the morning, sunlight was shining on the mountains, which instantly lifted everyone’s mood. Starting from Basu, the vegetation on the mountains became sparse, with barren hills stretching out, so rocks often fell onto the road due to weathering—quite dangerous.
On the Sichuan-Tibet Highway

Nujiang River Gorge
At a popular photo spot before reaching the “Heavenly Road’s Seventy-Two Turns,” the scene was incredibly grand and vast—so much so that we had to stitch together four vertical shots in post-processing.
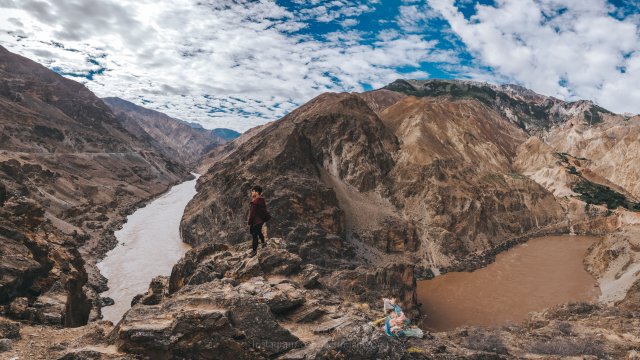
The Heavenly Road’s Seventy-Two Turns
Since I was traveling from Lhasa to Chengdu, after passing the Nujiang River Gorge, I had to wait for an off-road vehicle to drive through the winding road before climbing up to the highest viewpoint, where I could then turn back and shoot the Seventy-Two Turns. Unfortunately, without a drone, I could only capture some ordinary shots.
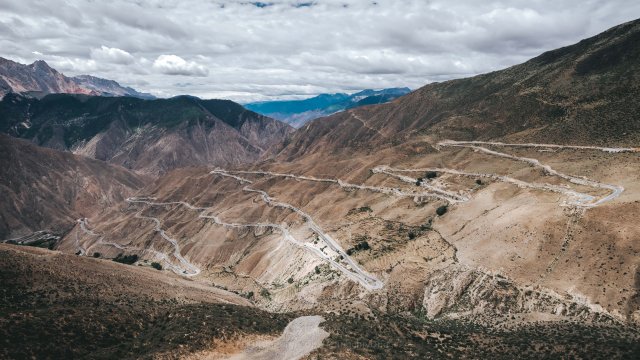

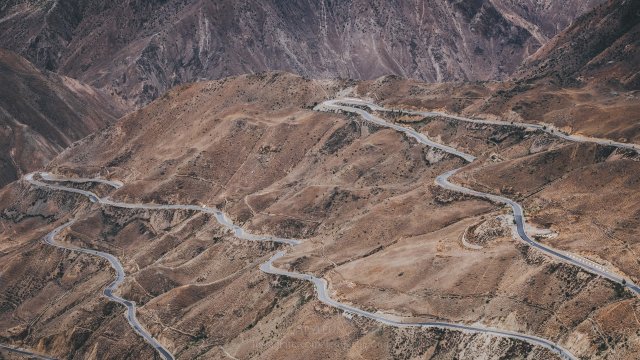
On the Sichuan-Tibet Highway
After the Seventy-Two Turns, there weren’t any particularly prominent scenic spots or viewpoints, but the scenery along the road remained absolutely beautiful.

Day 15– Heading to Shangri-La Town
Route: Mangkang – Batang – Litang – Daocheng – Shangri-La Town
On the fifth day of the Sichuan-Tibet Highway, the weather was fantastic, with blue skies and white clouds all day long. Originally, the plan was to stay overnight in Daocheng and then head to Shangri-La Town the next day before entering the Yading Scenic Area. But after being advised by the driver, we ultimately decided to push forward and head straight to Shangri-La Town for the night, allowing us to enter Yading early the next day. We were very glad we made that decision.
On the Sichuan-Tibet Highway
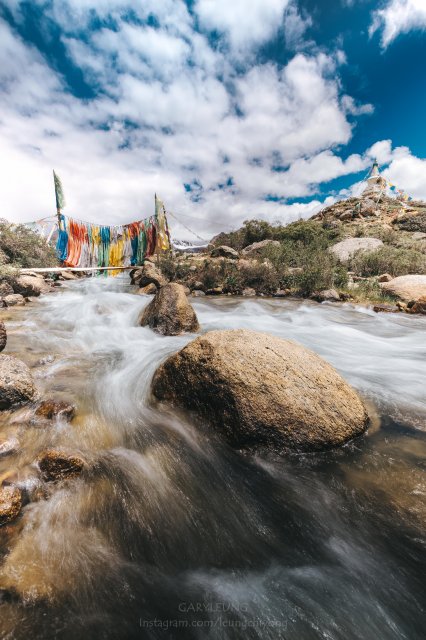
Near Sisters Lakes
Sisters Lakes
A key photo spot on the Sichuan-Tibet Highway. It’s a pity we were in a rush—if we’d stayed a while to shoot the sunset, it would’ve been amazing.

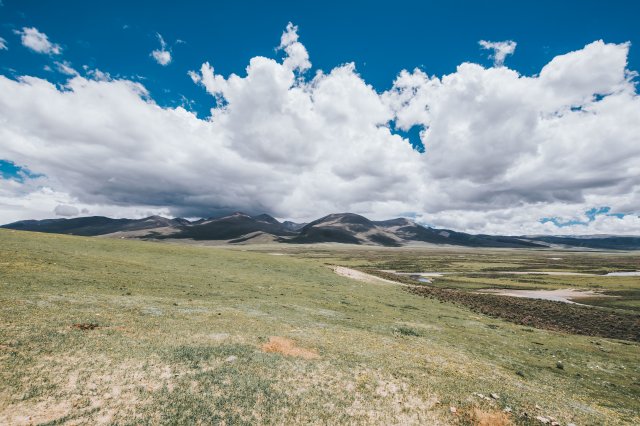
Maoya Grassland
Blue skies, white clouds, and a vast grassland—the atmosphere was really relaxing, making it a great spot for photos and a break.
Erlang Temple
A resting place after the Maoya Grassland. To be honest, I felt a bit ashamed—the monks were incredibly warm and welcoming, but perhaps because Erlang Temple is quite remote, there were very few visitors. We mistakenly thought the temple didn’t allow tourists inside. However, when my friend and I stepped through the gate, the monk half-lying on the grass in front immediately stood up and warmly invited us in, even offering to take photos for us. But, suspecting the worst, I thought there might be a charge, so I declined. Only my friend went in with the monk while I wandered around outside. The cat near the entrance was super cute, its ears perked up like a rabbit’s. It wasn’t scared of strangers—even when I waved at it, it didn’t leave but slowly came closer, letting me take photos.
Rabbit Mountain
On the way to Daocheng Yading, we passed by Tu'er Mountain. The entire mountain looked very barren, but from a distance, you can see two large rocks in the center branching out to the sides, resembling a rabbit’s ears.
Shangri-La Town
We finally encountered the only sunset of the entire trip when we arrived in Shangri-La Town in the evening. Unfortunately, we left too late and only managed to capture the last bit of lingering red.
Day 16- One-day tour of Yading Scenic Area
Route: Shangri-La Town - Yading Scenic Area - Luorong Ranch - Five-Color Lake - Milk Lake - Yading Scenic Area - Shangri-La Town
Cost: Scenic area ticket 270 RMB + shuttle bus to Luorong Ranch 80 RMB
The final stop on the Sichuan-Tibet Highway — Daocheng Yading, known as the last pure land on the blue planet. Though somewhat exaggerated, the scenery here is truly stunning. Of course, it would be even better if the ticket prices were lower and the weather clearer. Before entering the mountains, our plan was to take photos at Five-Color Lake, Milk Lake, and Pearl Lake. But later, since we were completely soaked in heavy rain and it was too cold, we had to give up climbing up to Pearl Lake after descending.
Given this, it is highly recommended that you consider taking a horse or donkey ride up to Milk Lake from Luorong Ranch and then hike down. This way, you won’t miss the scenery along the way, and you can still visit Five-Color Lake, Milk Lake, and Pearl Lake all in one day. Of course, if you hurry, you can also reach all three photo spots on foot, but it will be very tough, and it’s not recommended for those who have just started the hike. The horse riding fee is 500 RMB one-way or round-trip, regardless. Although the horse riding price is more expensive than the scenic ticket, it is definitely worth it, and you might not even get the chance to ride — my friend and I were among the first group of visitors, but by the time we reached Luorong Ranch, there was only one donkey left. We hesitated for less than 10 seconds before even that last one got taken. In the end, we could only hike up together slowly.
Xianuoduoji Snow Mountain
Luorong Ranch
Yangmai Yong Sacred Mountain

Scenery along the way


Gazing at Milk Lake
Looking for the perfect spot
Before heading to Daocheng Yading, I had planned to shoot a very unique composition: capturing both Milk Lake and Five-Color Lake in the same frame. Even though it was still raining when we arrived at Five-Color Lake, the rain wasn’t too heavy, so I decided to push on and climb up alone to try my luck. But unfortunately, I ultimately lost to the weather. I was just ten minutes away from the ideal shooting spot when suddenly the rain and wind intensified, so I had no choice but to give up and quickly head back down to meet my friends.
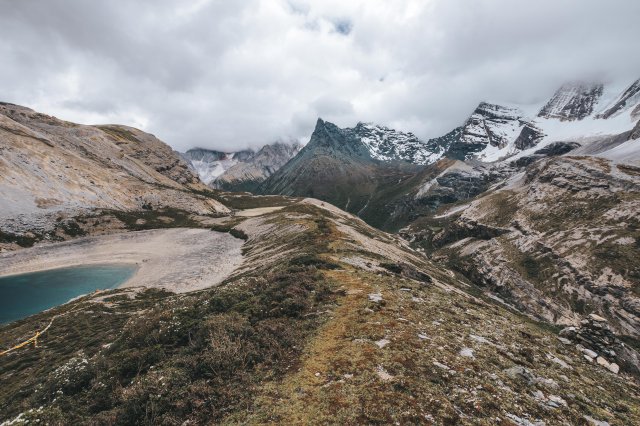

Milk Lake
Five-Color Lake
Foot of the mountain
After reaching the foot of the mountain, the sky suddenly cleared up with blue skies and white clouds. It was really frustrating to see this after the earlier conditions. You can only marvel at how unpredictable the weather is in high-altitude areas — while the mountaintop was engulfed in dark rain clouds, the foothills enjoyed clear blue skies.
Day 17- Heading to Xinduqiao
Route: Shangri-La Town - Daocheng - Litang - Xinduqiao
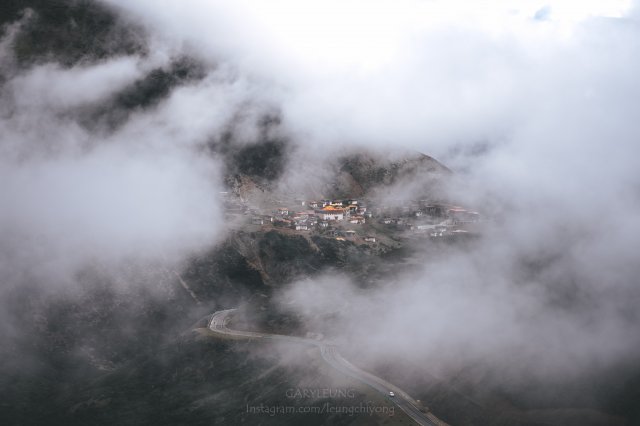
The seventh day on the Sichuan-Tibet Highway. After enjoying two days of blue skies and white clouds, the weather turned cloudy and rainy again. But when the mist enveloped the houses on the mountain, it suddenly created a fairy-tale-like scene.
On the Sichuan-Tibet Highway
Day 18- Heading to Chengdu
Route: Xinduqiao - Chengdu
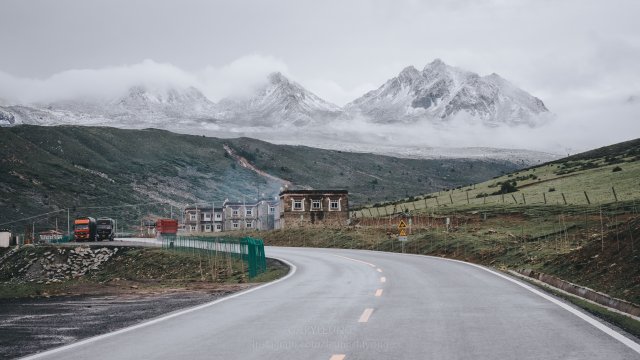
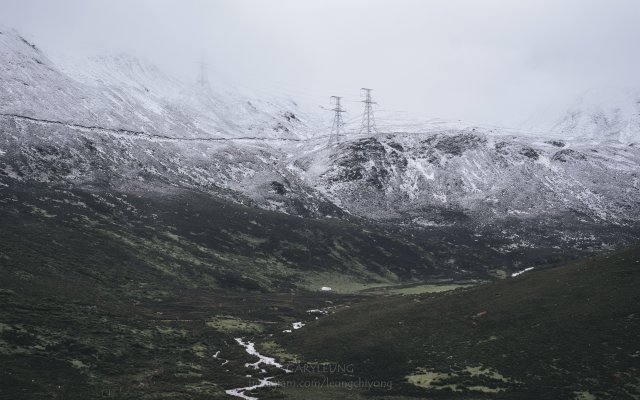
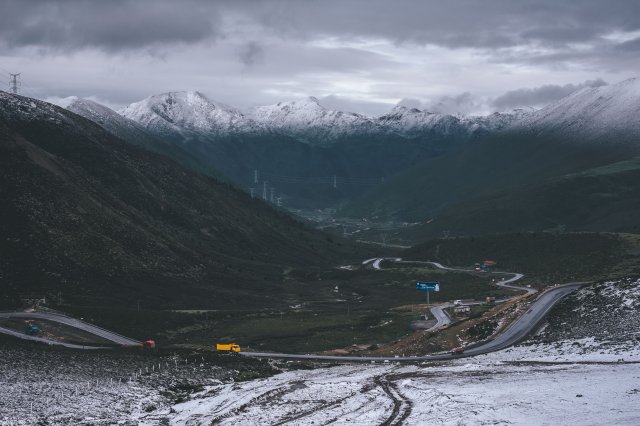
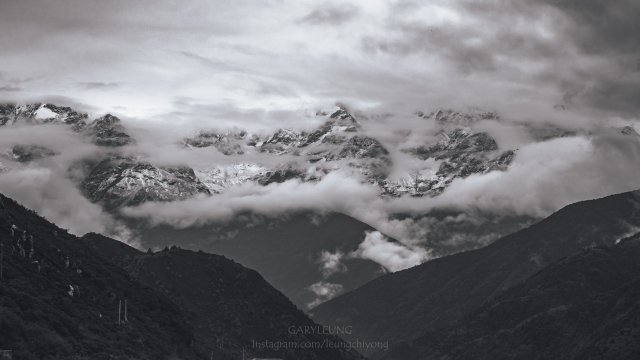
The final day on the Sichuan-Tibet Highway. It had rained non-stop the night before, and the weather was very cold. The driver told my friend and me that there was a good chance we’d see snow the next morning. Sure enough, not long after we set off, we could see distant mountain peaks covered in layers of snow. Snow in June — I don’t know whether to call myself lucky or unlucky, but one thing I know is that I finally got to experience snow up close.
On the Sichuan-Tibet Highway


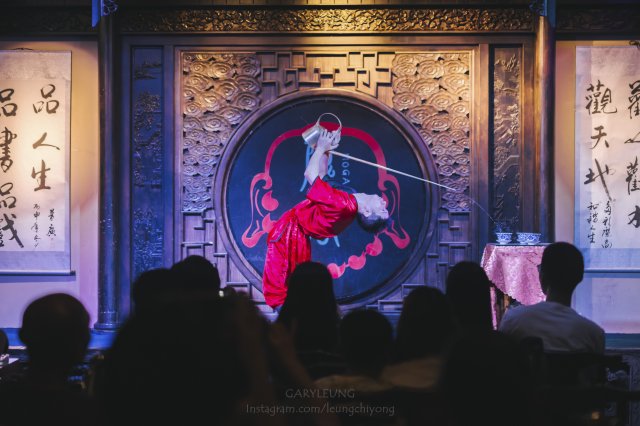
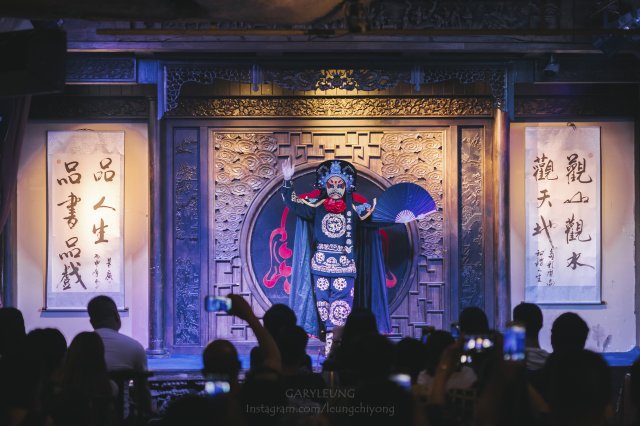
Wide and Narrow Alley Teahouse-Sichuan Opera Performance
After arriving in Chengdu, there was still plenty of time in the day, so after checking into the hotel, I quickly headed out to explore Kuanzhai Alley and Jinli, while also sampling some authentic local snacks. Many people say that Chengdu’s snacks are incredibly delicious, but to be honest, I really can’t speak highly of the ones at Kuanzhai Alley — they were expensive and the taste was just average, with not many varieties to choose from either. However, the Sichuan opera performance in the teahouse was definitely worth watching. The ticket price wasn’t too high, but you do need to buy a pot of tea. Sharing it with a friend made the cost quite reasonable. If you’re looking to try snacks, I’d suggest going to Jinli or just buying them directly from street vendors. Jinli offers a wider variety of snacks, and they taste better too. As for the street food, the selection is actually quite similar to what you get at Kuanzhai Alley, but the prices are much more reasonable, so there’s no need to waste money in touristy areas.

Day 19- Returning to Hong Kong
Itinerary: Chengdu – Hong Kong
On the final day of the trip, after stuffing myself with snacks at Jinli, I boarded the flight back to Hong Kong. Nineteen days — it was probably the longest trip I’ve ever taken, and saying I wasn’t tired would be a lie. But honestly, nineteen days still felt a bit too short for this itinerary. Because of the tight schedule, I ended up rushing through many places, only getting a fleeting glimpse. Still, due to time constraints, I had to push through and visit all the places I wanted to see. Of course, if time had allowed, I would have highly recommended slowing the whole trip down. Weather-wise, although the conditions along the Sichuan-Tibet Highway weren’t ideal towards the end, overall, the trip was still very rewarding.
Lastly, a small reminder for those who brought cameras to take photos: please, please, PLEASE pay attention to the photo storage format. Don’t make the same mistake I did — it wasn’t until the seventh day that I realized the format had somehow switched to BASIC JPEG, resulting in the first seven days’ photos having very low resolution and being difficult to edit. Also, make sure to calculate the times for moonrise and full moon. Don’t end up like me, arriving at Everest and Namtso right when there was a full moon — otherwise, you’ll miss the chance to see the Milky Way with your naked eyes.
(Since this travelogue was written in a hurry, if you spot any mistakes, feel free to leave a comment and I’ll correct them as soon as possible.)
Camera type & lens: Nikon D7200 + sigma 10-20 f3.5 + sigma art 50mm f1.4
FACEBOOK&INSTAGRAM
Feel free to follow each other for more exchanges :)